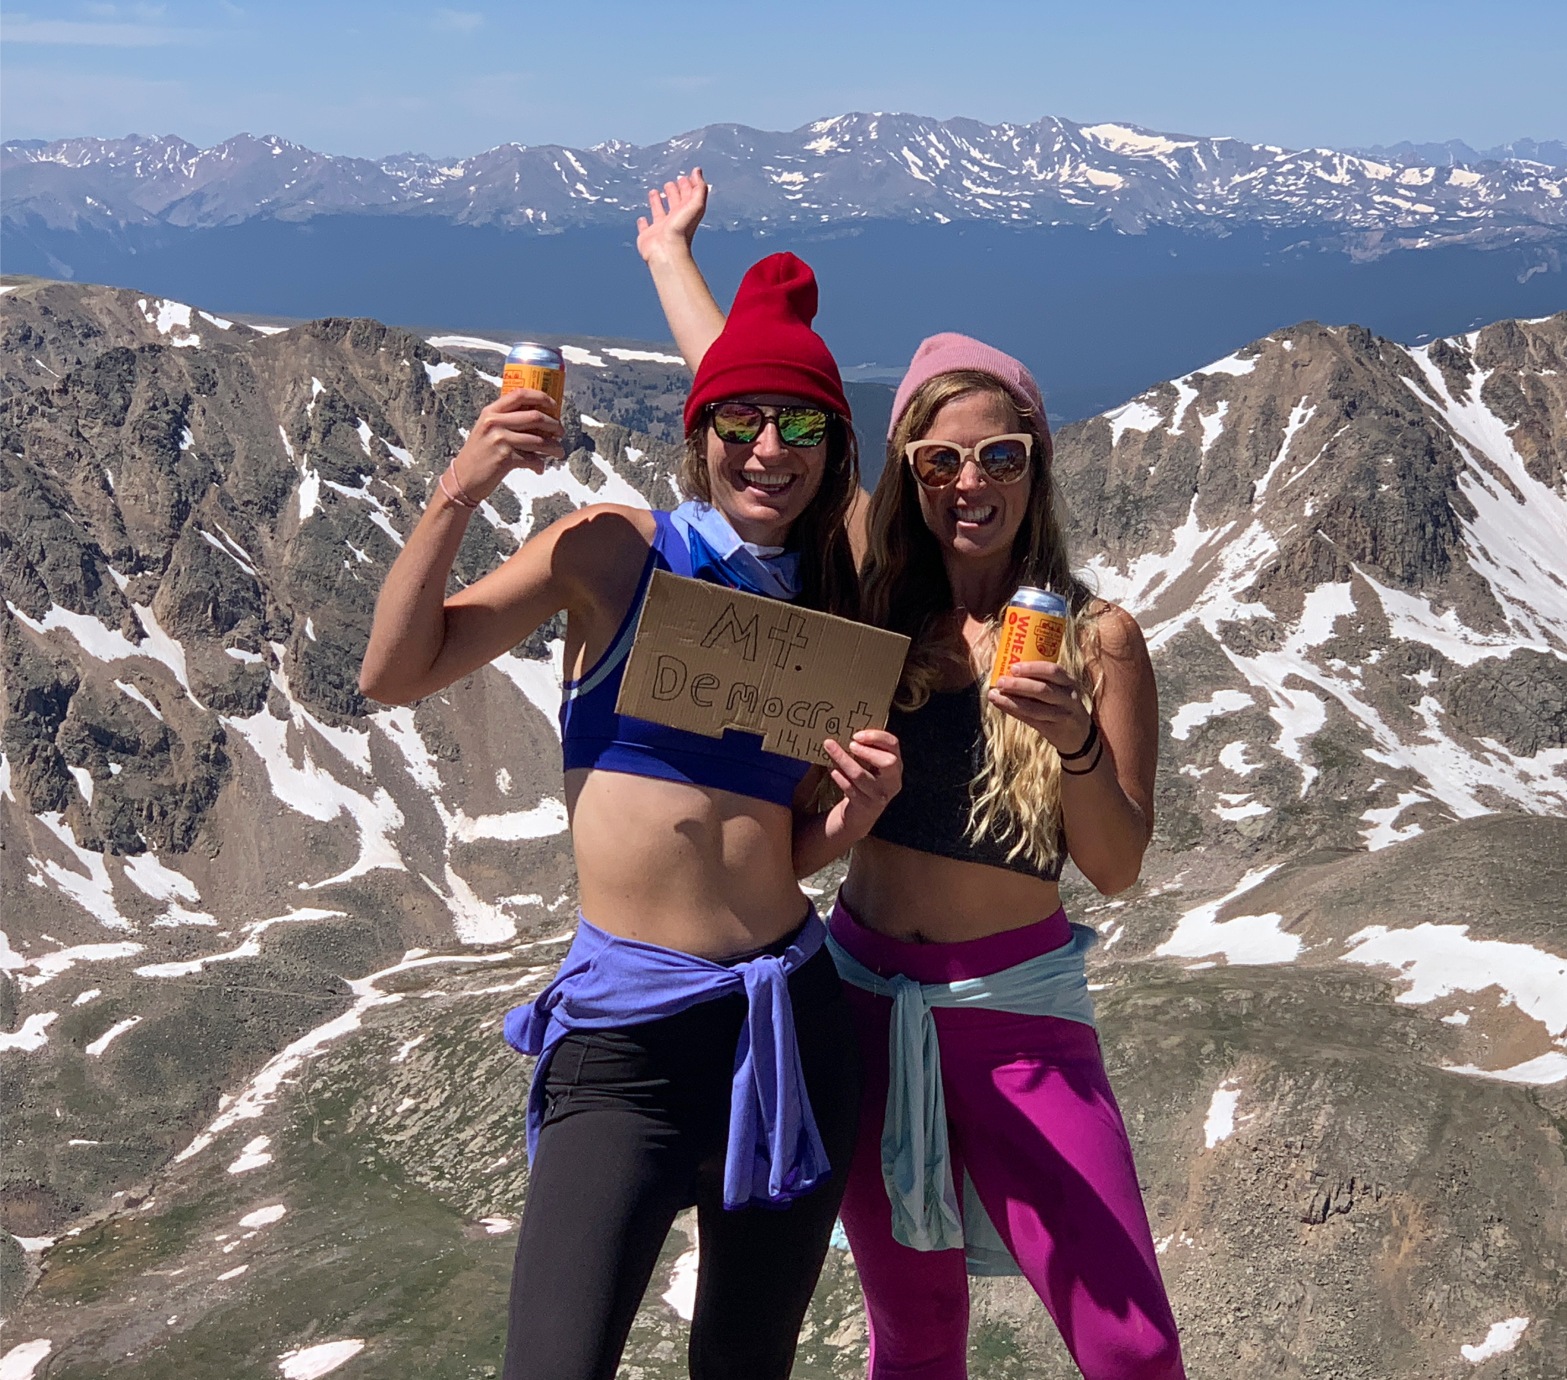
When I moved to Colorado, one of the first things that people began to tell me I simply needed to do was to hike the state’s famed “fourteeners.” Next to skiing and attending shows at Red Rocks, I swear hiking these beasts are every Coloradan’s favorite pastime — or at least the one that they love to talk about the most! If you’re unfamiliar with what a fourteener even is, don’t worry, you’re not alone. I didn’t know what they were when I got here, either! The fourteeners are Colorado’s 58 highest peaks, and they have elevations of over 14,000 feet above sea level. The views atop these peaks are incredible, the air thin, and the trails challenging. It’s kind of a rite of passage to hike one, and once you do, you keep on hiking them, perhaps to the dismay of your legs and lungs. Ready to give one a try but unsure where to begin? Allow me to introduce you to the DeCaLiBron, where you can hike not one, but four fourteeners in one shot — all for about the same amount of effort it would take to complete just one.
The DeCaLiBron is made up of four fourtneers — Mount Democrat, Cameron, Lincoln, and Bross — all of which you can hike up and over in one moderate loop. I’ve only done a handful of fourteeners so far, but I can say with confidence that this was the easiest trail of all those that I have done. Technically, Bross is on private land, so you cannot legally summit it. However, there is a clear, well-used, and heavily trafficked trail to the top. So do with that information what you will.
Getting There
This trail begins at the Kite Lake parking lot near Alma, Colorado (for detailed directions on how to get to the trailhead as well as trail conditions, check out 14ers.com). As with many of the trails in Colorado, different websites have different distances calculated for this hike, but most seem to fall between seven and eight miles for the loop with an elevation gain of just over 3,000 feet. That seems a little short to me, to be honest, as it took Carolyn, my hiking buddy, and I about seven hours to complete the loop (though we did take a break on every peak and took quite a long break atop Democrat) and we move at a pretty decent pace.
Carolyn and I arrived at the parking area at around 6:30 am, having met at the Wooly Mammoth Park ‘n Ride in Morrison at 4:30 am, and there were already so many cars there that we had to walk at least a quarter of a mile to the trailhead, so I would definitely recommend getting there early. This is a fee area, so be sure to bring cash (I believe the cost is five dollars per car). The last six miles of the drive out to the trailhead are on a dirt road, which is pretty smooth for the most part, but once you hit the fee area (around the last half mile or so), the road gets quite bumpy and full of divots. If you do not have a high clearance vehicle, I would recommend parking just before the fee area. If you’d like to camp overnight to ensure you get parking and don’t have to get up quite as early, there seems to be plenty of dispersed camping available along this road, as we saw multiple tents set up off the road and along the stream.
The Route
Since this trail is a loop, you have the option to hike clockwise or counterclockwise. We’d heard that the stretch between Bross and the trailhead is the steepest section of trail and contains a lot of loose rock, so we opted to hike counterclockwise to save our knees the stress on the way back down, and to try and prevent injury due to falling. After having completed the route, this seems like it is the best option, but it is of course up to personal preference. The more popular route seems to be to go clockwise and hike up Democrat first, which I can understand as it is the longest and most challenging section of trail. However, Democrat also boasts the best view of the four and Bross the most anti-climactic, in my opinion, and there is plenty of space to chill out and have a snack (or a beer!) on top, so again, I was really happy with the direction that we hiked. So, hiking counterclockwise, you hit Bross, then Lincoln, then Cameron, then Democrat. This trail is quite popular and easy to follow, so it should be fairly easy to navigate as you follow the loop and its offshoots to the top of each peak.
Hiking at Elevation
If you’ve never been hiking at this elevation before, let me warn you — the air is thinner and it’s tougher to breathe up there. I’m a fairly fast hiker and my instinct is to carry on at a quick pace as always. However, unless you’re in beyond-incredible shape, you’ll likely find yourself shorter of breath during physical exertion. My best advice based on my own experience and advice given to me is to take it slow and steady. It’s more efficient to stay on top of your breathing by moving slowly than having to stop every 20 feet to gasp for breath because you’re pushing too hard.
In addition, it’s important to be aware of the possibility of altitude sickness. At higher elevations, barometric pressure decreases and there is less oxygen in the air, according to Harvard Health Publishing. This can lead to symptoms of altitude sickness, especially at elevations above 8,000 feet, and can be dangerous. Symptoms can include a headache, nausea and vomiting, dizziness, lightheadedness, difficulty sleeping, and loss of appetite. In severe cases, people can develop high-altitude cerebral edema, which is life-threatening. I don’t mean to scare you — people hike at high altitudes all the time and have no issues whatsoever! However, I think it’s important to be aware of the signs and symptoms, and to have a plan if something does happen. I’d encourage you to read up on altitude sickness before you go, and to be smart and return to a lower elevation if your body is not reacting well to the elevation. (I am not a health professional, however, so take all of this with a grain of salt and do your own research).
Things to Know Before You Go
Unless you have special training in snow travel and avalanches, the best time of year to hike a fourteener is in the summer. Colorado, and mountains in general, can have some pretty wild weather, so it’s not unheard of for significant amounts of snow to fall anywhere from October to June (and sometimes even outside of that window). I’ve been told the safest months to hike fourteeners, for this reason, is between July and September, though sometimes June and October are decent times as well, depending on the snowfall of that particular year. Additionally, Colorado gets a lot of afternoon thunderstorms in the summer (monsoon season). It’s extremely dangerous to be above tree line when these storms hit (lightning is one of the leading weather-related causes of death in Colorado!), so it’s best to hike the high peaks early in the day. The general advice here is to be down below tree line, which is at about 12,000 feet, before noon. This leads to a lot of early mornings, but they’re totally worth it!
Carolyn and I hiked this loop in mid-July, and I couldn’t imagine a more beautiful time of year to be on this trail. The weather was perfect — we sat at the top of Democrat, chatting with other hikers and enjoying the view for at least 30 minutes, which can sometimes be unheard of that high up. Air temperature tends to drop quickly as you ascend — you can expect it to decrease by 3.6 degrees Fahrenheit for every 1,000 feet that you climb, according to University Corporation for Atmospheric Research — so make sure to bring layers. And let me tell you, the wildflowers were popping! We were greeted at the trailhead by a sea of reds, yellows, pinks, and purples, and it just warmed my soul.
Bonus: we saw mountain goats!! If you know me, you know that I am a total nature nerd and love seeing wildlife. As we hiked down Cameron, some good Samaritans stopped us and pointed just off the trail. There was a big old goat chilling out just down the mountain. Then we saw another on our way back down to the trailhead, running across the mountain. So keep your eyes peeled as you hike (and keep your distance if you do see them, of course)!
Happy hiking, everyone! If you enjoyed this post, please follow me on Instagram and join my e-mail list!

Badass! Great work!
LikeLiked by 1 person
Thank you! It was a lot of fun! 🙂
LikeLike
Hey Audrey,
This sounds like an epic adventure! We have added it to our forever growing list of hikes around the world. And I totally agree with you that you need to save the best view to last. Thanks for such an informative post 🙂
Candace
LikeLiked by 1 person
Hi, Candace. Awesome! Glad you enjoyed it. I love that you have a list of hikes you want to do around the world!! What is in your top three, if I may ask?
LikeLike
My ultimate top three are Torres Del Paine, The Wakhan Corridor and Trolltunga! But it changes often when I find new hikes and amazing destinations 🙂 This year has been a whole lot of dreaming!!
LikeLike
WHOA Trolltunga looks amazing!! I really want to get out to Norway so I’m going to have to add that to my list! 🙂
LikeLike
It really does, doesn’t it!? There just isn’t enough time to see all the wonderful places in this world!!
LikeLiked by 1 person
Amen to that!
LikeLike
Very cool pic. Congratulations
LikeLiked by 1 person
Thank you, Matt! 🙂
LikeLiked by 1 person